Versus Clipper Windows Guide: Capture Buffer, Save Replay, Edit & Share
Versus Clipper on Windows: Sign in, first clip check, replay buffer, Save last N s / Ctrl+Alt+F8, Library edit, watermark-free export or share a viewing link — free, local until you upload.
Direct answer: On Windows, open Versus Clipper, Sign in with Versus, run Getting started (Automatic game capture ou Choose a source myself), confirm game/desktop audio + mic, then Enable automatic capture ou Start capture check → Save a test clip → Looks and sounds right. Start the replay buffer on a game, window, or display until status shows buffering, hit Save last N s or the default shortcut Ctrl+Alt+F8 (lengths 15 / 30 / 60 / 120 s, limited by buffer), open Library, Editar (trim, audio, FX, text), then Export watermark-free at 16:9 / 9:16 / 1:1 ou Share a viewing link. Local until you upload. Free capture + manual edit. Optional AI coins show price before confirm. No Remap plan required.
This is the Versus Clipper product Windows Guide — player-first suite series, same lane as the Mate, VPN, and Audio first-session posts. It is not the soft teaching walkthrough from mid-September (Versus Clipper Windows Setup: Save the Replay, Edit the Cut, Share the Link). Soft-link that sibling for narrative pace. For FPS-overhead judgment and 9:16 framing deep-dives, use the Capture guides at the end — this post stays on Help-grounded first-session spine.
What Versus Clipper is
Versus Clipper is a free Windows 10/11 app for capture, replay save, timeline edit, and share. One Versus account.
Capture + replay — game, window, or display; live buffer; save the moment when it happens.
Edit + out — trim on your PC, export watermark-free, or upload a viewing link friends open without an account.
Recording a clip does not publish it. You decide what leaves the machine.
Step 0: Free access — Set up Clipper
You do not need a paid Remap plan.
- Open Versus Clipper on Windows 10/11.
- Choose Sign in with Versus. Continue in the browser, match the code, approve, return.
- Product entry is Set up Clipper / Help — not a download-now binary promise. Catalog status is current; there is no public installer URL to promise here.
Sign-in connects shared clips and AI coin balance. Capture and manual editing are available from the desktop app. Signing out stops capture but keeps local clips and edits.
Step 1: Sign in and run the first clip check
In Primeiros passos:
- Choose Automatic game capture ou Choose a source myself.
- Review Game and desktop audio and Microphone before you trust a save.
- Select Enable automatic capture ou Start capture check, then wait for capture to begin.
- Choose Save a test clip, play it back, and select Looks and sounds right.
- Choose Adjust and test again if the source or sound needs changing.
Get the test clip right once. Every later save inherits that confidence.
Step 2: Start (and stop) the replay buffer
Clipper continuously replaces older footage in the replay buffer until you save a moment.
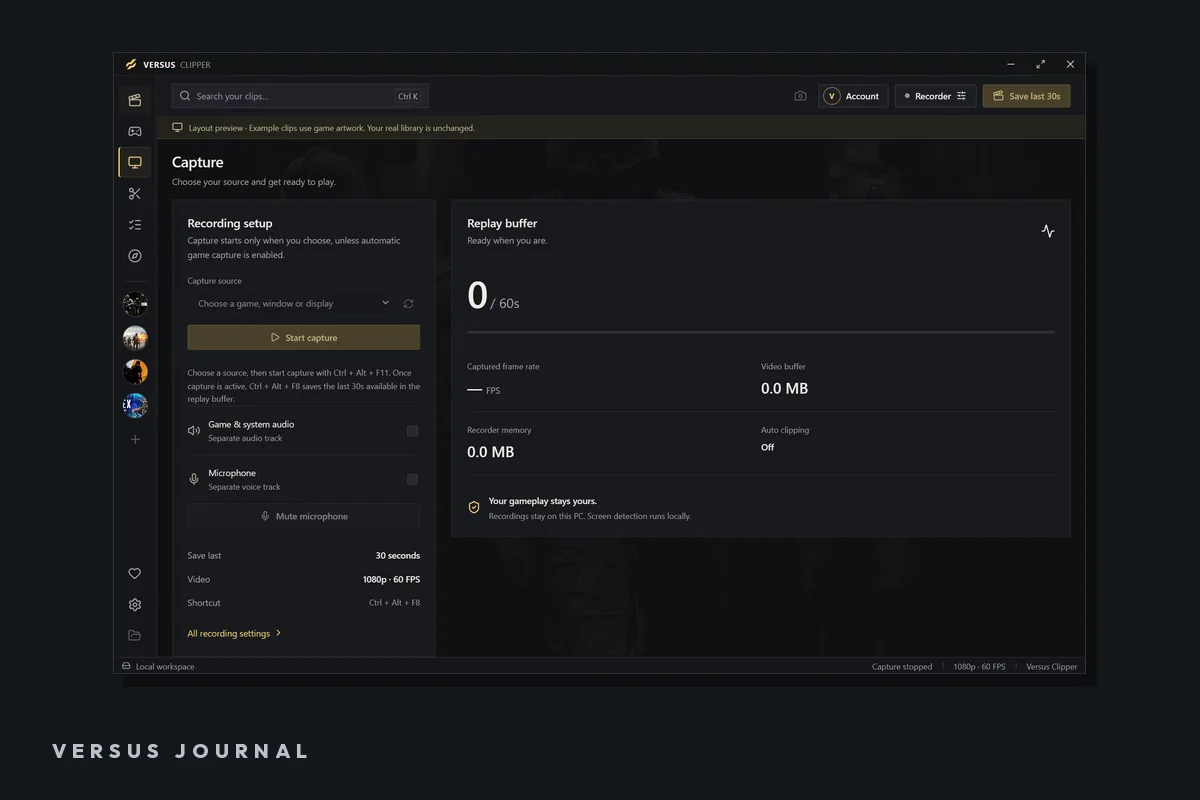
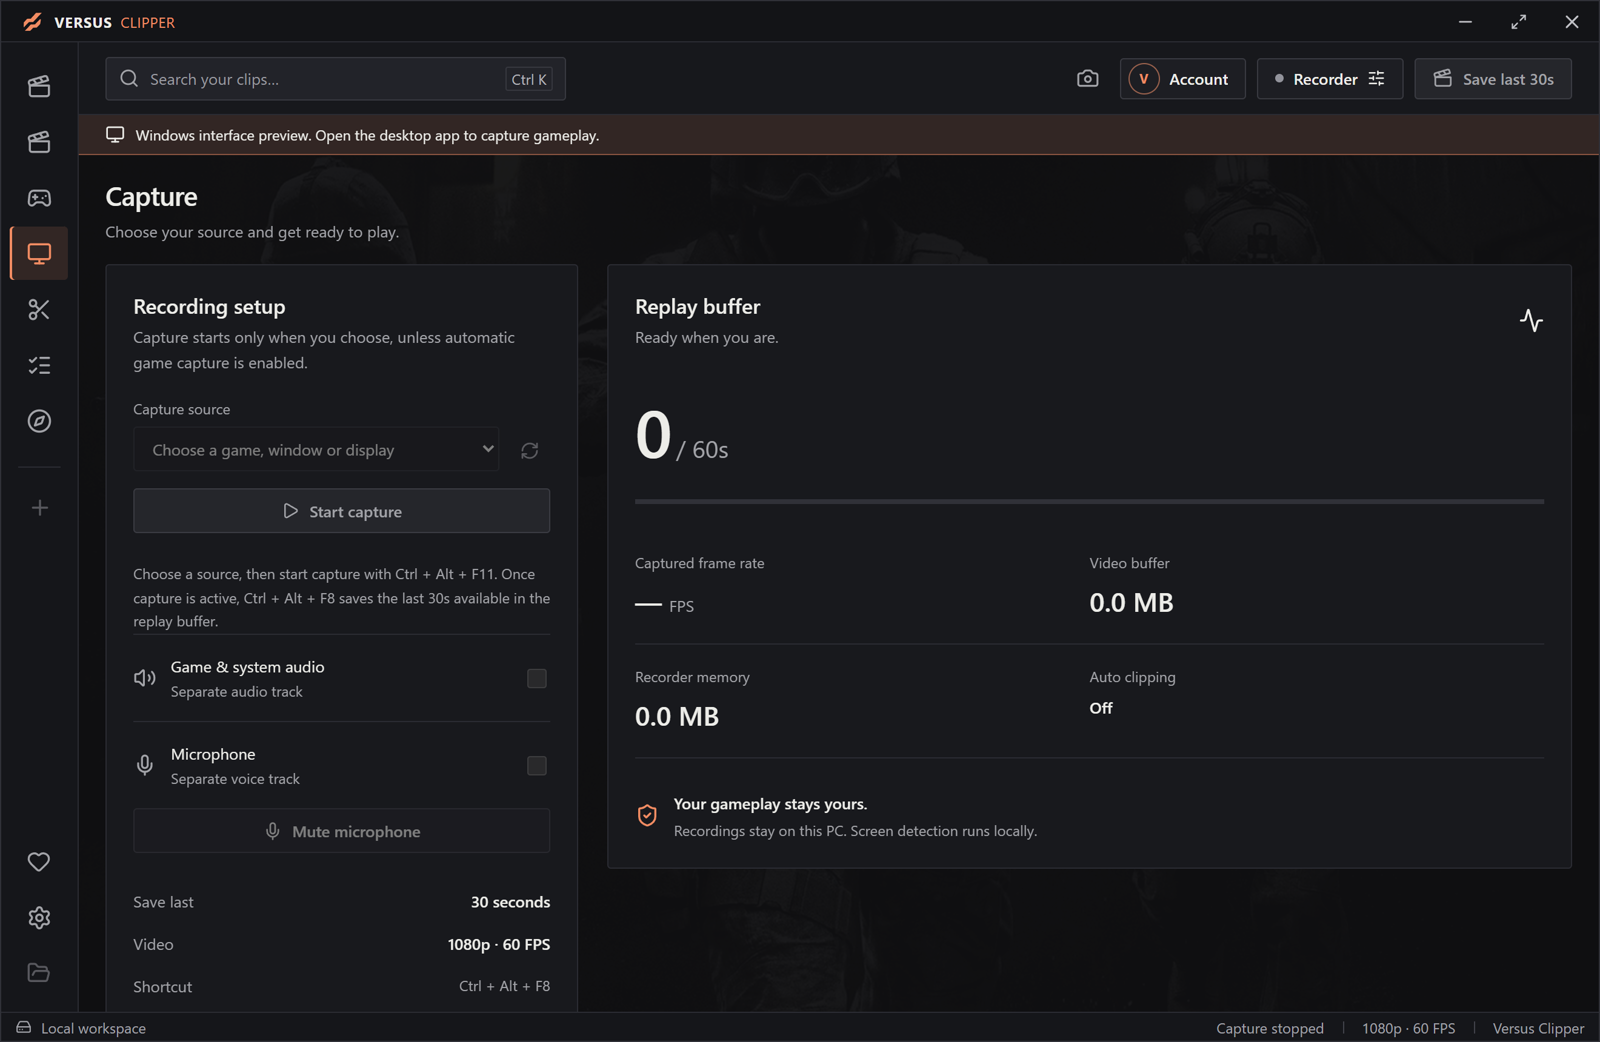
- On the Capture page, pick Capture source — game, window, or display.
- Refresh capture sources if the list is stale.
- Enable Game and desktop audio and/or Microphone in capture setup or Settings.
- Choose Start capture and confirm the recorder status is buffering.
- Choose Stop capture when you want the buffer to end.
Automatic game capture starts the buffer when an enabled game is foreground. Choose a source myself lets you select and start when you want. Stop capture before changing a source.
Step 3: Save last N s (or a screenshot)
While capture is buffering:
- Wait until at least a short buffer is available.
- Choose Save last N s on the command bar (N is your configured default clip length), or use the configured clip shortcut from inside the game.
- Product default shortcut display: Ctrl+Alt+F8. Save length is adjustable in the app.
- Wait for the save confirmation, then find the new video in Library.
- For a still frame, choose Take screenshot while capture is active.
Under Settings → Recording, set Default clip length and Replay buffer. Available clip lengths are 15, 30, 60, and 120 seconds. The saved clip is limited by the buffer — a shorter buffer produces a shorter save.
Optional Mate path (soft): if Versus Mate has Clipper access enabled and Clipper is already running, Mate can request a save from Clipper’s existing replay buffer. Same buffer. Same local-first rule. See Mate and Help Use Clipper from Mate.
Step 4: Find it in Library
Abrir Library for clips saved on this PC.
- Use Search clips…, game and tag filters, or collections: All clips, Auto highlights, Favorites, Screenshots, Trash.
- Sort Newest first, Oldest first, or Longest first. Timeline groups by date; switch grid or list as you like.
- Open a video and choose Editar, Share, favorite, or Show in folder.
- Move to Trash when a clip should leave the active library. In Trash: Restore clip ou Delete permanently.
- Open clips folder to view the local folder in Windows Explorer.
Trash stays on disk until you permanently delete. Local first, always.
Step 5: Edit — trim, audio, canvas
Open a video → Editar (or open a session part in the editor). Tools: Editar, Audio, FX, Text, AI, Export.
- Set start here / Set end here, or drag timeline handles to trim.
- Use Split, Duplicate cut, or Detach audio as needed.
- In Text, add an overlay, set position and size, or remove it.
- Review audio levels, color looks, and transitions in their matching tabs.
- Choose Export video. When it finishes: Show in folder ou Share export.
Manual editing is free. Optional AI tools show their coin price before you confirm.
Import when needed: H.264/AAC MP4 up to 10 minutes, 4K, 240 FPS, two audio tracks — original unchanged. Speech captions run locally when bundled speech files are available.
Step 6: Export ratios — keep the original
Pick the frame for where the clip will be watched. Clipper keeps the original recording while you prepare the export.
| Destination feel | Format |
|---|---|
| Full-screen watch / group chat | 16:9 |
| Vertical destinations | 9:16 |
| Square destinations | 1:1 |
No export watermark on the free manual path. Editing and exporting do not replace your originals.
For 9:16 framing judgment (HUD safe areas, crop mistakes), soft-link How to make vertical gaming clips on PC — do not rewrite that guide here.
Step 7: Share a viewing link (optional)
Want the squad to open it in a browser?
- Choose Share on a video in the active library, or Share export after an editor export.
- Clipper uploads the selected local video to your Versus account and returns a viewing link.
- Keep Clipper open while the upload moves through its progress states.
- Send the link — not a login. Friends watch without creating an account.
Cancel leaves the local clip. Shared links and thumbnails live in the website library; local recordings remain on this PC. Use an active library video — not a screenshot or Trash item.
Local until share
Recording a clip does not publish it. Recordings stay on your PC until you choose to upload. That is the rule: local first, share when you mean it.
Sessions (optional light depth)
Need the whole recording, not only replay moments? Open Sessions after capture is running: name it, pick a storage limit (5 / 10 / 25 / 50 GB), Record session, then Stop session. Session footage is new — it does not include the earlier replay buffer. Interrupted row → Recover session when parts are available. Deeper session edge cases → escalate with the exact error.
Fail triage (Help-citeable)
Recorder disconnected → Reconnect. Preview unavailable → Show in folder. Interrupted session → Recover session. Export error → source clips remain safe. Stale account → Refresh account balance. Competing-recorder or Windows permission click-paths not on Help → escalate with the exact error — do not invent steps.
Soft links (siblings — do not cannibalize)
- Teaching sibling: Save the Replay, Edit the Cut, Share the Link
- FPS soft teaching: Record gameplay without losing FPS — no FPS promise here
- Vertical soft teaching: How to make vertical gaming clips
- Product + Help: Clipper · Guide · Setup · Capture · Guardar · Library · Editor · Share · Mate → Clipper
FAQ
Is Versus Clipper free? Do I need Remap?
Capture, manual editing, and watermark-free exports are free. Optional AI tools use AI coins and show the cost before you confirm. You do not need a paid Remap plan.
Do I need a Versus account?
Sign in to the Windows app with your Versus account. It connects your shared library and AI coins. Friends opening a shared clip do not need to sign in.
Are my recordings uploaded automatically?
No. Recordings stay on your PC until you choose to upload a clip for sharing.
What is the default save shortcut?
The product displays Ctrl+Alt+F8 as the default replay shortcut. Save length is adjustable. Available clip lengths in Help: 15, 30, 60, 120 seconds, limited by the buffer. Configure or Restore default shortcuts under Settings → Hotkeys.
Can I export without a watermark?
Yes on the free manual path. Choose 16:9, 9:16, or 1:1 for where the clip will be watched. Editing and exporting do not replace originals.
How do I share a clip with friends?
Upload the clip you want to share and copy its viewing link. Friends watch in the browser without creating an account. Keep Clipper open during upload.
Can Mate save a Clipper replay for me?
Only if Clipper is running and Mate access is enabled. Mate requests a save from Clipper’s existing buffer — it does not replace Clipper.
Can I download Clipper as a public .exe from this post?
Follow Set up Clipper / Help. This post does not promise a public installer binary URL. Catalog installerUrl is null.
Will Clipper guarantee my FPS?
No honest first-session claim ties capture to a frame-rate promise. For encoder-cost judgment, read the FPS soft sibling linked above.
Soft next step
Abrir Versus Clipper, run the first clip check until it looks and sounds right, keep the buffer buffering, save with Save last N s ou Ctrl+Alt+F8, cut in Library → Edit, then export clean or send a watch link. Click paths: Clipper Help. Soft teaching sibling: Save the Replay, Edit the Cut, Share the Link.
Save the play. Keep the original. Share when you mean it.